Teardown: Wi
- LEDS
- 2023-09-23 23:14:04

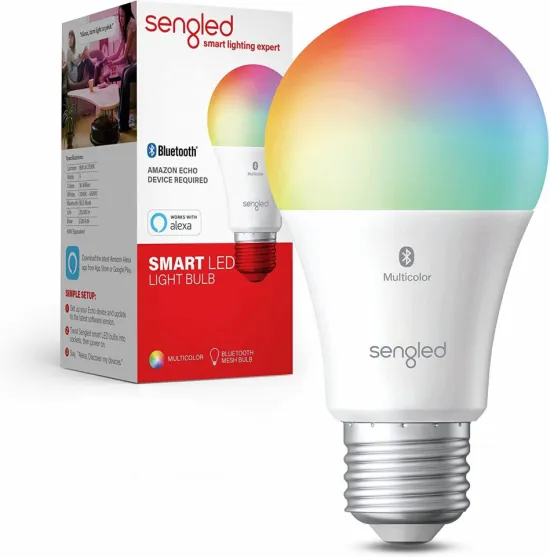
So when I recently saw that Amazon had Wi-Fi-based “smart” LED bulbs on sale for $15.99 each, I bit again. Specifically, I’ll be looking at the TP-Link Kasa KL110, which right now is back to its usual $19.99 price tag on Amazon. To clarify upfront, while TP-Link refers to it as being “dimmable,” it’s only controllable in this way in conjunction with the manufacturer’s own Android and iOS apps, as well as via a user’s “cloud” account. Try to dim it using a conventional dimmer switch and you’ll likely end up with erratic results along with the likelihood of premature failure.
That all said, let’s dive in, beginning with some as-usual box shots:


Crack open the box, and all you’ll find inside is a slim double-sided sliver of literature and the stylish (at least IMHO) bulb itself:


Here are some closeups of the exterior markings:

From past experience, I knew my heat gun probably wouldn’t enable me to pierce the bulb’s insides, so I went straightaway with the “heavy artillery” this time:

Beginning with the pliers applied to the bulb’s base … which didn’t get me too far:


Time to turn my attention to the globe (and my hacksaw):


Here’s an overview of the illumination portion of the innards, clearly showing the multi-LED array, along with the connector supplying power and control feeds:

Hey, what’s that thing sticking out of the middle? (I’m placing my bets on it being the Wi-Fi antenna. You?)

Those two screws holding the LED plate in place were no match for the handy-dandy screwdriver always with me at my desk (anyone else remember M-Systems?):


Liftoff achieved:


Still a long way to go (note the thermal paste connecting the LED plate to the much larger metal assembly below it, which acts as a heat sink) although I can see the Wi-Fi antenna (or whatever it is … I’m still betting on the Wi-Fi antenna idea) markings a bit more completely now:


At this point, from past experience, I knew I was facing the toughest disassembly step. Chipping away at the plastic exterior didn’t get me anywhere except a bit bloody (slight injury, as longtime readers already know, is a longstanding Brian Dipert teardown tradition):


Applying the hacksaw further down didn’t lead to positive progress, either … only additional plastic shavings all over my desk:

Eventually, and as carefully as possible (although, as you can see, I still damaged the end of the PCB a bit), I set to work with a combination of the pliers and a flathead screwdriver:

Eventual success was achieved by using the screwdriver as a chisel in combination with a hammer to drive its tip down and deep inside the seam between the top and side metal assemblies:


Now this is interesting. The first (and only easily removable) bit is the shield surrounding the base of the antenna (or whatever it is) and covering the next-door capacitor. I’m guessing it’s a Faraday shield to minimize the amount of EMI from circuitry behind it from leaking out through the hole in the LED plate for the antenna (or whatever it is).


I would have bet that the black stuff was hard resin plastic, but it ended up being soft rubbery stuff. And after hacking away at it a bit with a box cutter, I had the brilliant (if I do say so myself) idea of trying to push the whole glob out of its surrounding metal sarcophagus from the back end, by means of those two wires I showed you earlier. Voila!

Back to the box cutter now, along with my thumbs, to peel the black rubbery stuff away:


Mission accomplished, eventually, at least to the limits of my patience:


And finally, a couple of closeups:


See, I told you … Wi-Fi! And thanks to the FCC ID stamped on the side of the wireless transceiver module, you can further explore (via certification documentation) what’s inside it, too!
Thoughts? Lemme have ’em in the comments!
—Brian Dipert is Editor-in-Chief of the Embedded Vision Alliance, and a Senior Analyst at BDTI and Editor-in-Chief of InsideDSP, the company’s online newsletter.
Related articles:
Teardown: Zigbee-controlled LED light bulbTeardown: What killed this LED bulb?Teardown: A19 LED bulbTeardown: A Wi-Fi smart plug for home automationWill LED-based Wi-Fi work?Connected lighting may be the IoT killer appTeardown: Wi由Voice of the EngineerLEDSColumn releasethank you for your recognition of Voice of the Engineer and for our original works As well as the favor of the article, you are very welcome to share it on your personal website or circle of friends, but please indicate the source of the article when reprinting it.“Teardown: Wi”